How to Get Read Permissions in Windows 10 Hard Drive
Windows protects its files/folder by providing an extra layer of permission parameter over them. If you don't have enough permission to access the designated files/ folders, you cannot edit or modify the files. Now, what if you desire to open a folder that prohibits your access with the following message 'You lot must have read permissions to view the properties of this file' or merely 'Y'all don't have permission to open this file'? This is where we are to solve your problem.
Prepare one – Ain the binder from the command line
Y'all tin can change the ownership of the file/folder from a concluding.
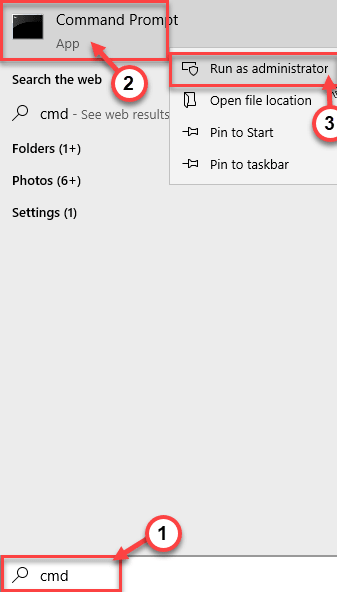
one. At present, blazon "cmd" in the search box.
ii. Then, right-click on the "Command Prompt" and click on "Run as ambassador".
3. Once the Command Prompt opens up, type and modify this lawmaking according to your scenario and hit Enter.
takeown /f "path of the folder or file" /a /r /d y icacls "location of the binder or file" /t /c /grant administrators:F Arrangement:F everyone:F [Supervene upon the 'location of the folder' with the location of the folder on your computer.
Example – The location of the folder on this computer is at –
C:\Users\Sambit\Pictures\New binder
And then, the commands will be –
takeown /f "C:\Users\Sambit\Pictures\New folder" /a /r /d y icacls "C:\Users\Sambit\Pictures\New folder" /t /c /grant administrators:F System:F everyone:F 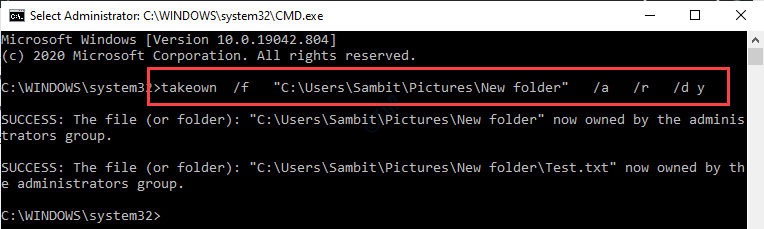
Once you have owned the particular files/folders, yous can easily access them without seeing the fault bulletin on the screen.
Fix 2 – Adjust advanced sharing settings
You have to requite total command to your account.
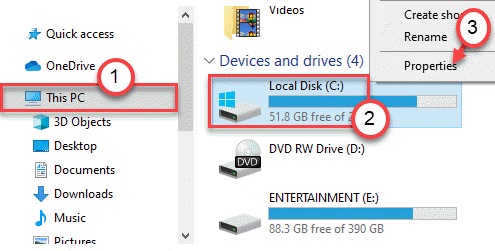
1. Open the File Explorer.
two. Then, go to the "This PC" on the left-manus side.
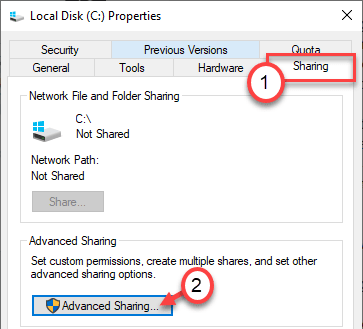
three. Correct-click on the "Local Disk (C:)" drive and click on "Properties".

4. Go to the "Sharing" tab.
five. Next, click on the "Advanced Sharing" option.
6. Now, you have to check the box abreast "Share this folder".
7. Click on "Permissions" to modify the permissions.

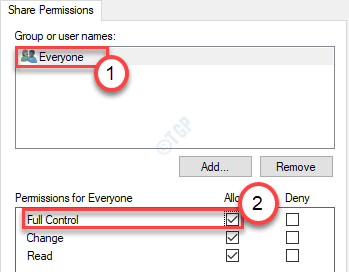
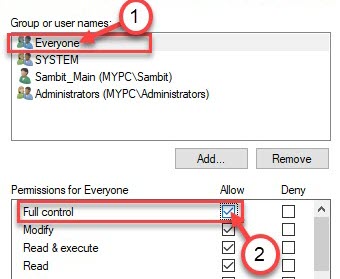
eight. Here, select "Everyone" from the list of users.
9. Cheque the box beside "Total control".
ten. Don't forget to click on "Utilise" and "OK" to save the changes.
Try to open the file/ binder over again. This should fix the consequence y'all are facing on your computer.
Prepare 3 – Requite permission to your account
The reason you are being shown this fault message is your account is not allowed to access this file/binder.
1. Get-go of all, open up File Explorer.
2. Then, go to the location of the problematic file/folder.
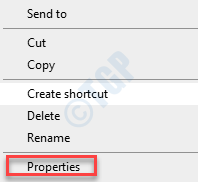
iii. Once you get there, right-click on the file/folder and click on "Backdrop" to modify it.
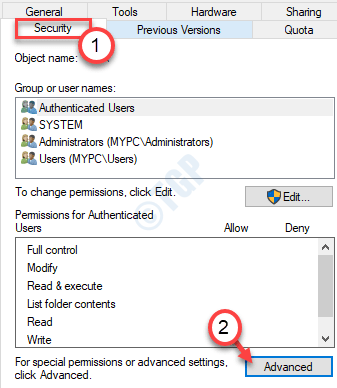
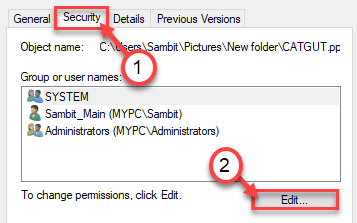
4. In the Backdrop window, become to the "Security" tab.
5. Next, click on the "Advanced".
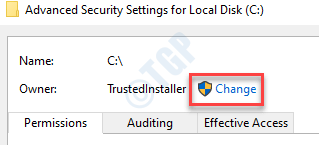
half dozen. At present, you accept to alter the ownership of the file. To do that, click on "Modify".
6. Next, click on "Advanced".
7. Here, just click on "Find Now" to view the list of groups.
8. After that, whorl down through the list of groups or users and select your user name.
(For this estimator the user proper noun is "Sambit".)
9. Click on "OK".
10. Over again, click on "OK".
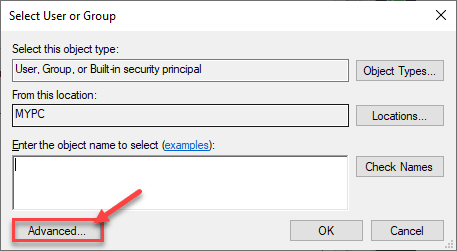
11. You lot take to cull a principal. , click on "Add".
12. Afterward that, click on "Select a principal".
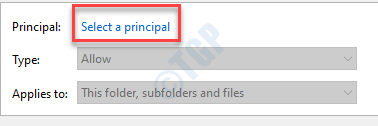
13. Next, click on "Advanced".
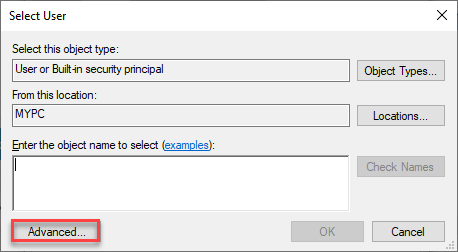
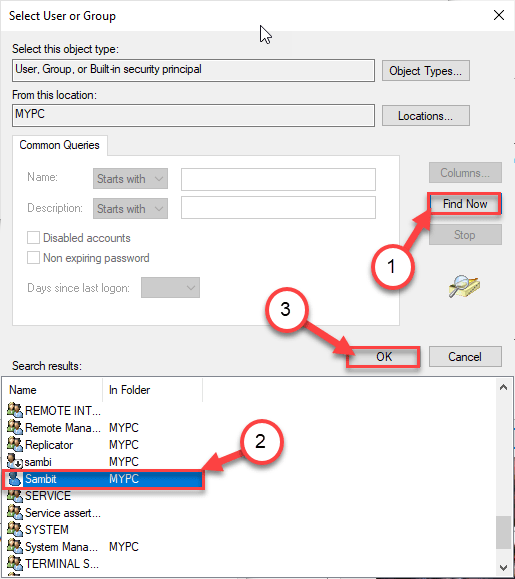
14. Just similar earlier, click on "Find Now".
15. Then coil down and select your user name. (For this computer it is "Sambit".)
sixteen. Save the alter by clicking on "OK".

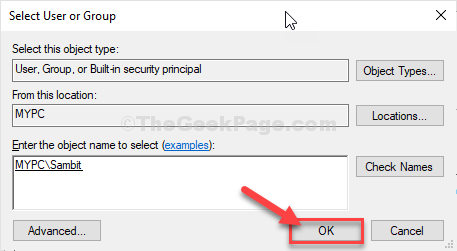
17. Click on "OK" to add together this object.
18. Next, check the box beside the "Full control" pick.
19. And then, click on "OK".
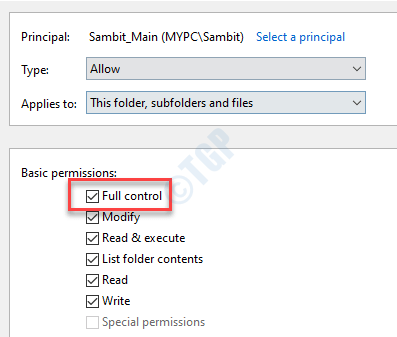
twenty. Finally, click on "Employ" and so on "OK".
Go back to the location of the folder and effort to access it once more. If this doesn't
Fix 4 – Modify your local account to administrator
Try converting the electric current account to an authoritative account.
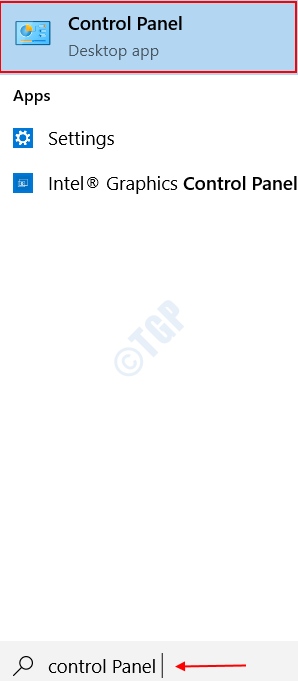
1. At first, press the Windows primal and write "Control Panel"
2. Click on "Command Panel" in the search box.
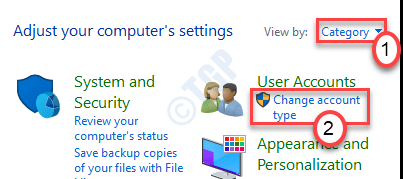
3. Here, you demand to click on 'View by:' and then choose "Category".
4. And then, click on "Change account type" under 'User Accounts' in order to alter your account type.
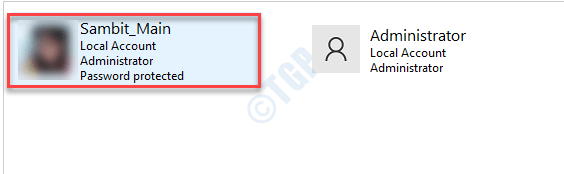
five. Here you will notice all the accounts associated with this arrangement. But click on the account y'all are currently using.
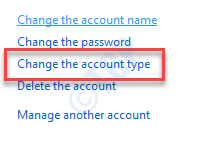
vi. Subsequently that, on the left-hand side, click on the "Change the account type".
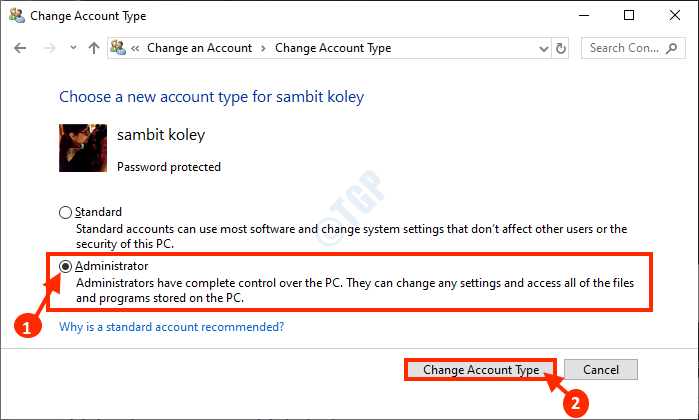
7. Click on the radio-push beside, "Administrator" to set this account equally an administrator of this reckoner.
8. Later on doing these, click on the "Change Account Blazon" to save this alter.
Close Control Panel window.
And so, try to access the file/ binder again.
Prepare 5 – Requite full permission to the drive
Sometimes the drive where the file/ folder is perchance missing some crucial permission.
one. Open up the File Explorer on your system.
2. Click on "This PC" on the left-hand side.
3. Correct-click on the particular bulldoze containing the file and click on "Properties".
(Example– If the file is at the C: drive, go to the C: drive in the File Explorer).
4. Once the Properties window opens, just get to the "Security" tab.
5. Hither, click on "Edit" to change the permissions.
5. Select the group "Everyone" * .
6. After that, bank check the "Allow" box of ' Total control ' permission.
This will enable all the users of your reckoner admission of the file.
seven. Afterwards that, click on "Utilize". Afterward that, click on "OK".

*Annotation–
You may not see 'Anybody' in the permission entries box. Simply follow these steps to add the 'Anybody' group.
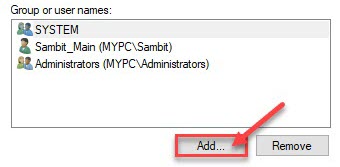
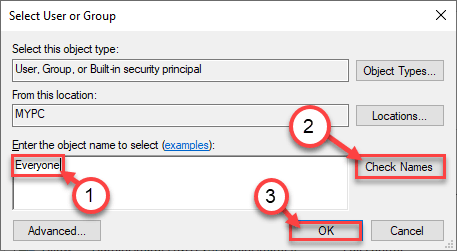
a. In one case y'all take opened the Properties window, click on the "Add".
b. Next you need to write "Everyone" in the 'Enter the object name to select:' box.
c. Only one time click on "Check Names" to perform a check the authenticity.
d. Finally, click on "OK".
eastward. Click on "Apply" to relieve it.
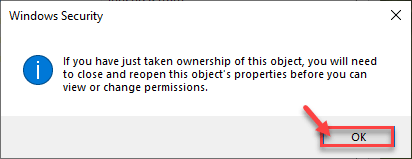
f. If you see a warning bulletin, just click on "OK".
g. Just click on "Apply" and "OK" to save this change.
After calculation 'Everyone', follow the instructions from step v to footstep seven to give full control to everyone.
Try to admission the file again on your computer.
Fix 6 – Run SFC check
Check if the abuse in system files has done this trouble.
i. Press the Windows key+Southward keys together and commencement to write "cmd".
2. Farther, right-click on the "Command Prompt" and click on "Run as administrators".
3. Type this command so hit Enter.
sfc /scannow
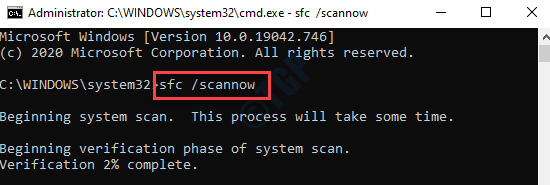
Once the SFC checks commence, it will take 4-5 minutes to completely scan the system files.
Restart the system and try to open the file/ folder.
Fix seven – Boot into condom manner and delete one-time users
Yous tin can remove old user business relationship permission and give full control to your principal account.
STEP 1 – Kick into safe mode
1. Simply printing the Windows central and the 'I' cardinal together.
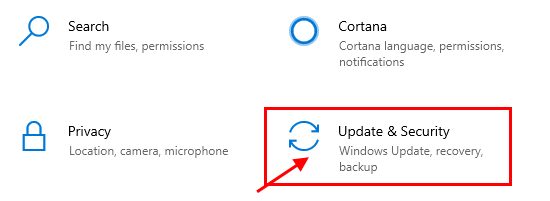
ii. Afterward that yous need to click on "Update and Security".
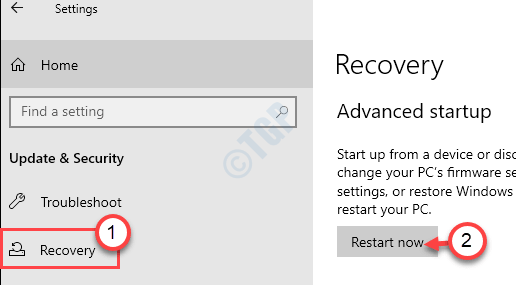
3. And so, click on the "Recovery".
four. Later that, under the "Advanced Startup" section, click on "Restart Now".
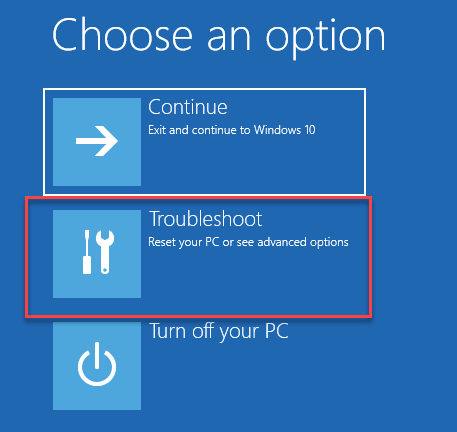
5. Once your pc reboots, just click on "Troubleshoot".
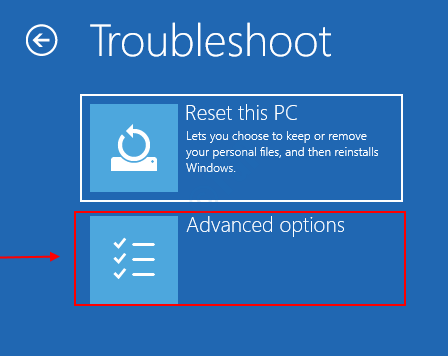
6. After that, choose the "Advanced options" carte.
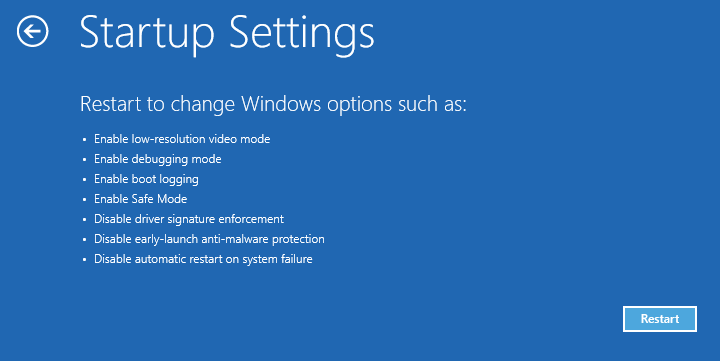
7. Simply, click on the "Startup Settings".
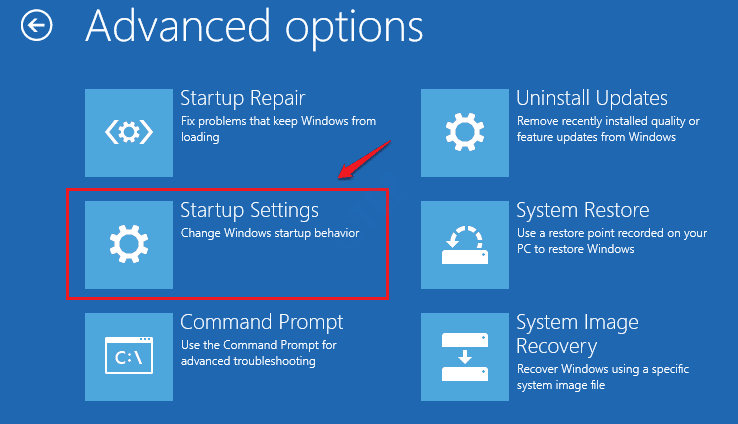
8. Finally to restart your device in the correct manner, click on "Restart".
9. Here you lot will find various possibilities of startup types.
10. Then, press F4 from your keyboard to select the option that says "Enable Safe Mode".
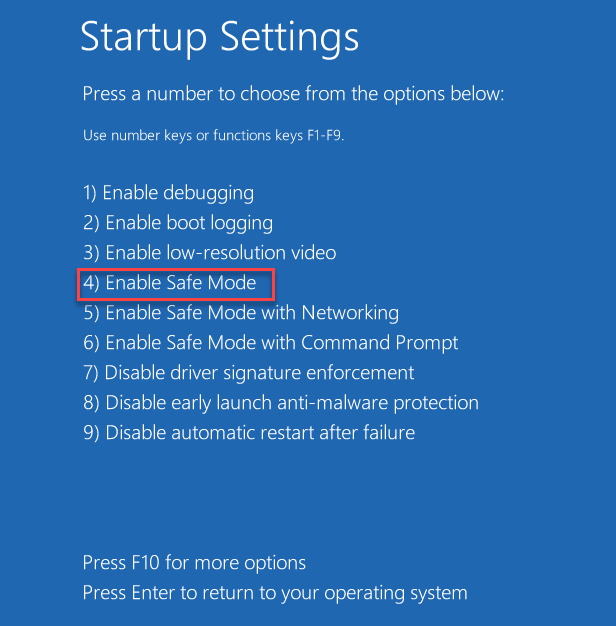
Shortly, your computer will boot into safe mode.
STEP 2 – Add your business relationship as the owner
In one case yous are in condom manner, you have to add together your account as the owner of the binder.
1. Open the file/binder location on your system.
2. Then, right-click on the particular file and click on "Properties" to alter information technology.
4. Afterwards that, get to the "Security" tab.
5. Then, click on the "Advanced".
6. In the Advanced Security settings, click on "Add".
7. Then, click on "Select a principal".
8. Later on that, click on "Advanced".
9. At present, click on "Find Now".
10. After that, you lot will observe a list of users. Select your user name from here. (For this reckoner it is "Sambit".)
xi. Relieve the alter by clicking on "OK".
12. Finally, click on "OK" to add this object.
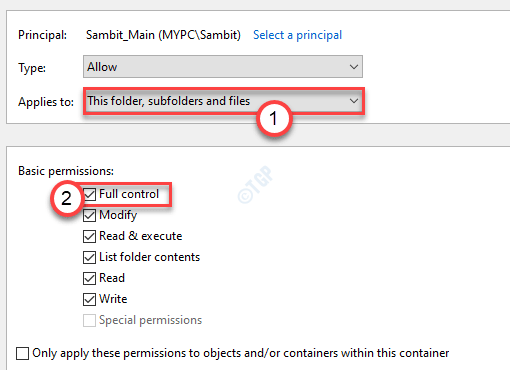
13. Prepare the 'Applies to:' to "This binder, subfolders and files".
fourteen. Next, bank check the box beside the "Full control" pick to requite your business relationship full control.
xv. Then, click on "OK".
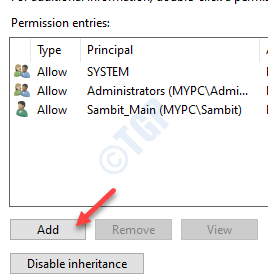
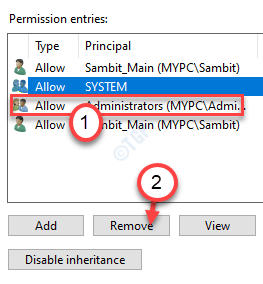
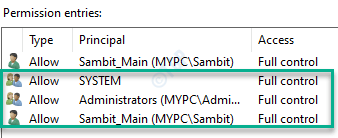
15. Coming back to the Advanced Security screen, check out the permission entries.
Y'all volition find some old accounts in that list.
16. Select the old account you want to remove permission of.
17. Click on "Remove" to remove the account.
xviii. Repeat the process to remove all the sometime account permission attributes from your system.
19. Finally, click on "Utilise" and and then on "OK".
Close all the opened windows. Try to access the problematic file/folder once more.

Sambit is a Mechanical Engineer Past qualification who loves to write about Windows ten and solutions to weirdest possible problems.
Source: https://thegeekpage.com/you-must-have-read-permissions-to-view-the-properties-of-this-object-fix/
0 Response to "How to Get Read Permissions in Windows 10 Hard Drive"
Post a Comment